Graphic organizers come in handy when you’re working with Kindergarten, first grade, and second grade students. But first, if you’re not 100% familiar with graphic organizers, let me explain what they are! Graphic organizers are any sort of visual tool or representation used to organize ideas. They can help take really complicated concepts (such as planning an opinion piece of writing or determining a theme of a story) and simplify them visually.
For instance, after having read a text, a teacher might have her 2nd grade students fill out a Venn diagram to compare similarities and differences of two characters. Another example – having Kindergarteners plan out a narrative story using a beginning, middle, and end graphic organizer before they actually begin writing.
When it comes to graphic organizers, the possibilities are endless!
Here are just a few (of many more!) types of graphic organizers:
- planning out any piece of writing
- sequencing a story
- cause and effect
- main idea and details
- story elements (characters, setting, problem/solution)
- diagramming a new vocabulary word
- life cycles
Graphic organizers can be used in both reading and writing instruction. In this post, I’ll give 3 tips for teaching K-2 students to use graphic organizers effectively to plan their writing!
By the way, everything you’ll see in this blog post comes from my Structured Graphic Organizers for K-2.
Always Lead With Modeling
When you’re teaching students how to plan a piece of writing, you might at first think “Oh, maybe I can just show them the graphic organizer, talk them through the steps, and they’ll catch on!” This might work for some kids. But a vast majority are going to need you to model.
My first tip is to always lead with modeling. So, what you’ll need to do is actually pretend YOU are a student – think aloud as you go through your process, draw pictures, and write out an example.
I know some teachers worry that if they model, students will just copy them. And yes, this IS a possibility! You can mention something such as “Today I wrote about ____. That was my own idea. Writers use their own ideas, so I’m excited to see what new and different idea you’ll write about!”
Reflecting back, I don’t think I did enough modeling when I was first learning how to teach writing. However, I quickly saw how important it is. If you’ve ever modeled writing for your students, I bet you’ve seen the huge impact it has on them!
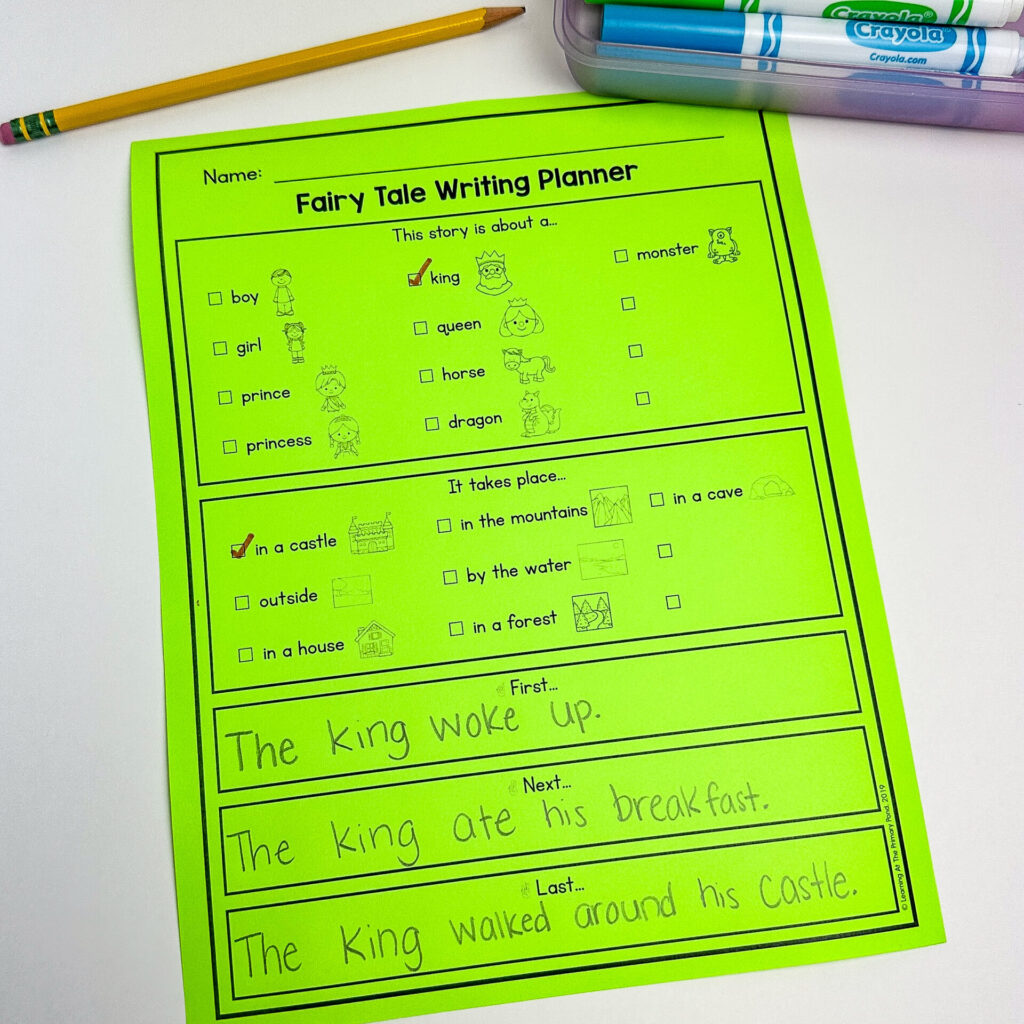
Above is one of the graphic organizers included in the Structured Graphic Organizer product. With this, you would model how to plan out a fairy tale.
When you’re using this, start with a think-aloud where you are just saying what comes to your mind as you brainstorm. Example: “There are so many things I want to include in my fairy tale! Let me look at this list of ideas. ‘boy, girl, king, queen.'” And then narrow it down to which ones you want to include in your story. You’d model how to physically check off which options you’re selecting.
It’s also good to mention what NOT to do. For instance, if you think your first graders may just check every single box under “This story is about a…,” make sure to model why you’re only picking 1-2 characters.
For the “First, Next, Last” part, you’d want to model how to talk through the story a bit and then jot down some thoughts about what happened first, next, and last so they’re staying on topic and in sequential order when it’s time for them to write their own story.
Work With a Partner
Sometimes partner work can be “scary” for teachers to try out – there are definitely routines you have to think about ahead of time for it to be successful. The benefits, however, greatly outweigh any downside! (For more on this, check out a blog called “Why Is Partner Work Important? How Do You Set It Up Successfully?”)
The second tip I have is to use partners to enhance student planning, and therefore improve writing overall. Sometimes students can work together to fill out a graphic organizer, like this one:
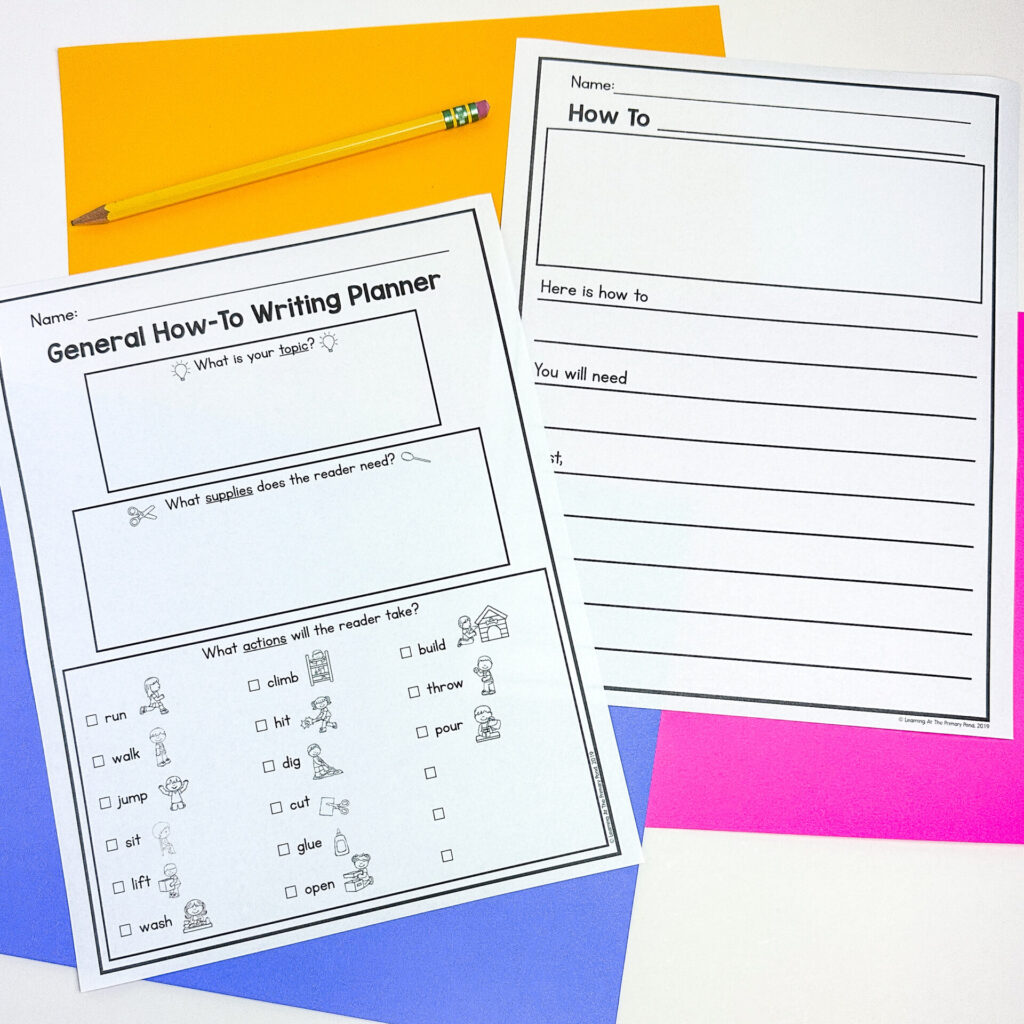
Even before kids write, I’d have students turn to a partner. They’d take turns telling one another verbally what they’re going to draw or write. Students could do this for each part of the graphic organizer. This helps get their oral language going, which can help them figure out what to put in the graphic organizer.
Then, once they’ve filled out the graphic organizer, they can get back with their partner again for feedback. The partner can ask more questions which might be helpful in figuring out if they’ve missed a part or if something isn’t clear. Having that student-to-student perspective is really helpful for kids, both before and after their planning.
Explicitly Teach the Transfer
I don’t know if this has ever happened to you, but once in a while, I’ll have a student who does a wonderful job with a graphic organizer, and I think the writing will turn out to be great, too! But that isn’t always the case. Sometimes, the student takes the graphic organizer and goes to write their actual piece, but ends up writing a totally different story. Or sometimes, they take their graphic organizer and have no idea at all how to actually turn that into a story with more details.
It can take a little bit of time for students to figure out how to do this, and that is totally normal. But that’s exactly why you need to explicitly show them. A document camera is a good tool for this – but you can use anything, as long as students can clearly see what you’re doing as you move between the graphic organizer and the actual piece of writing.
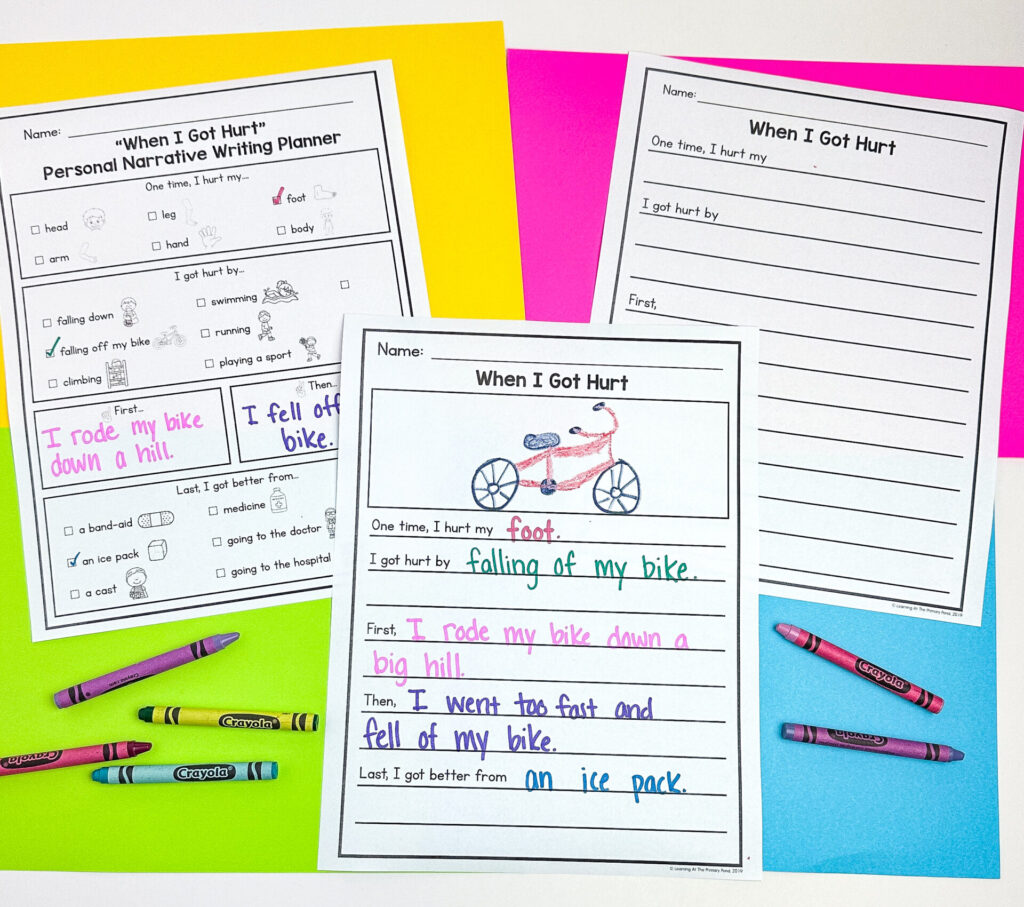
Above is an example of something you could do to visually show this to students. Maybe on day 1, they are filling out that graphic organizer on the left. I’d think aloud of a time when I got hurt. Then, I’d show them how to transfer the thoughts into the checklist/jotting down thoughts on the graphic organizer.
Next, I would explicitly teach how to actually use the graphic organizer to transfer that into a piece of writing (what you see above in the middle.)
You could even take it a step further and, on a different day, explicitly show how to add more ideas/details to the writing using the writing page on the far right. Whatever you do though, they need to see the process of transferring their thoughts from the graphic organizer to an actual writing sheet.
Conclusion
I hope you found these tips on graphic organizers helpful! Remember that I have a product solely devoted to graphic organizers! My Structured Graphic Organizers for K-2 cover Narrative, Informational, and Opinion writing. This resource can help students who may struggle to respond to writing prompts or write independently. Check those graphic organizers out HERE!
Happy teaching!