Most of the time, a student’s phonics development corresponds to his or her guided reading level.
This makes guided reading a great time for a little word study or writing, since students are usually grouped by their reading levels!
However, my groups often spend a long time reading the book during guided reading. It can be a real challenge to find time for word study or writing. Can you relate?
Word study, phonics instruction, vocabulary, writing, and other follow-up activities can be extremely valuable components of a guided reading lesson. But we may not always have time for them.
And really, I do think that this is okay. Because…
- The main purpose of guided reading is to get kids READING real texts!
- I teach word study at other times of the day, in small groups, so I don’t always have to include it during guided reading.
However, when you do have time to include phonics, word study, vocabulary study, or writing into your guided reading lessons, you’ll want your activities to be brief, engaging, and powerful.
So in today’s post, I’ll share 10 examples of quick, meaningful “follow-up” activities that you can use at the end of your guided reading lessons.
Many of the materials featured in today’s post can be found in my FREE guided reading toolkit, which you can sign up to receive here by clicking here:
Photo credit: Racorn, Shutterstock
Note: This post contains Amazon affiliate links.
Mix and Fix with Sight Words
I’ve done this activity for years, but it’s also one that Jan Richardson mentions frequently in The Next Step in Guided Reading.
The purpose of “Mix and Fix” (which I sometimes call “Make-Tornado-Fix”) is to help students practice making sight words. The activity is best used when students are first learning a sight word, as opposed to when they’ve already mastered one and just need to review it.
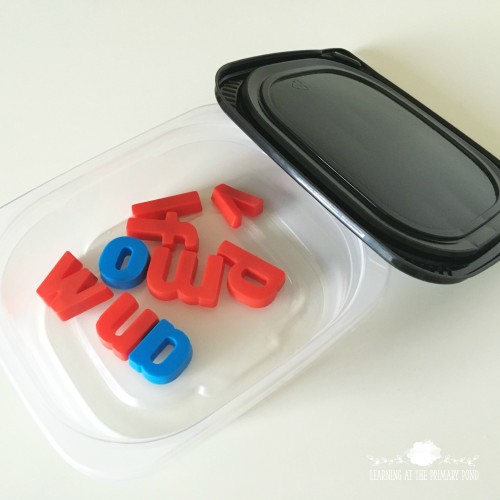
To use “Mix and Fix,” give students the magnetic letters they need to make the sight word. You’ll want to make sure you’ve separated the letters out beforehand, since you’ll likely have multiple students in your guided reading group and won’t want to waste time searching for the letters.
I have been hoarding saving plastic lunchmeat containers for the past year, because they are great for storing magnetic letters or other small items:
When students are first learning a word, you may want to allow them to copy from the model (write the word on an index card or whiteboard). After students finish, they should always do two things:
1. Check the word, using your model (letter by letter, left to right)
2. Read the word aloud
Then, students should mix up the letters and make it again (this time without looking at any model).
This is a fun, hands-on way to learn sight words that takes very little prep!
Trace and Write Sight Words
Speaking of sight words…I am a big believer in the power of having kids write sight words in addition to reading them. (I don’t mean 10 times each or rainbow writing – I’m talking about quickly writing them from memory during small group instruction.)
To introduce a sight word during guided reading, I help students read it from a card, do the “mix and fix” activity described above, trace it in the air, trace it on the table, and then write it on a whiteboard.
Then, in a subsequent lesson, I ask students to write the sight word from memory. This time I just have them write it on a whiteboard.
In her The Next Step in Guided Reading book, Jan Richardson gives some great tips about prompting kids to spell it correctly. For example, if students have been asked to write “there,” you can tell a child who is struggling that it has the word “the” in it. This helps them make connections between the different sight words they know and the ones that they’re learning.
Picture or Word Sorts
Sorts are another quick activity that you can use at the end of a guided reading lesson. You can use them to teach both phonological awareness and phonics.
Picture sorts are great for teaching students to hear and distinguish between:
- Rhymes
- Beginning sounds
- Ending sounds
- Digraphs
- Blends
- Word families
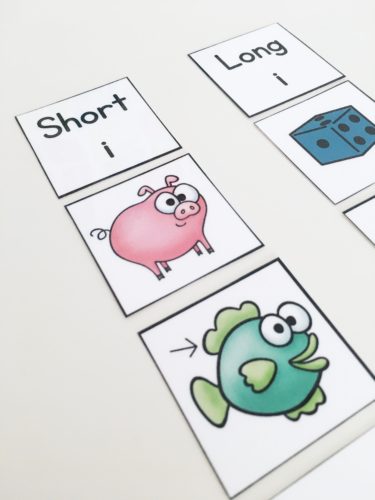
Before students are able to read and write sound patterns, they need to be able to hear them! Picture sorts are a quick way to provide this valuable phonological awareness practice. Here’s an example of a short/long i picture sort from my Guided Reading Lesson Resources for Level G:
I like to keep pictures for sorting in an index card box. You can include sections for pictures that can be sorted by initial sounds, ending sounds, digraphs, blends. etc. I just write down in my plans which feature I want students to learn, and then grab the appropriate pictures out of my box.
Before I do the sort, I typically go through the stack of cards and have students practice naming each picture. I make sure that every child is saying each word. This helps them focus on really listening for the sounds in the word when we do the sort afterward (because they’re not wondering about the names for the pictures).
Next, I tell students what we’re going to be “listening for” during the sort, and I model sorting 2-4 pictures into the groups. I name each picture and emphasize whatever feature we’re focusing on.
Next, I give students turns sorting the pictures. We do just one picture at a time, and then I ask the group to state whether they agree or disagree with the way the picture was sorted.
Once all of the pictures are sorted, we “read” down each column by saying the name of the picture. I also introduce print at this point by putting a card with the letter or letters that go with the column. I have students explain the differences between the columns to a partner (i.e. “The words that start with ch go on this side, and the words that start with sh go on that side.”)
If time permits, students can choose one of the words from the sort to write on their whiteboards.
More advanced readers can work with word sorts, rather than picture sorts. Make sure that all students in the group are reading the words, not just looking for the letters or letter patterns.
Generally, I do not give each child in the group their own set of word cards for sorting. I have just one set for the whole group, and we sort them together. I can, however, send students back to their seats with their own sets so that they can practice sorting the words again as an independent or partner activity.
Sound Boxes and Segmenting Practice
Learning to orally segment CVC words into their individual sounds is an important phonological awareness skill for early readers. And since phonological awareness instruction can be most effective in a small group setting, guided reading is a great place to sneak in some practice.
Elkonin boxes are a quick and easy way to have students practice segmenting words. First, do some modeling. Say a CVC word aloud (like dog). Then say it again, this time breaking it up into its individual sounds (/d/ /o/ /g/). Touch one box for each sound you say.
Next, give students their own Elkonin box strips. Say a word aloud. Students can either touch one box for each sound, or push a counter into each box as they say each sound in the word.
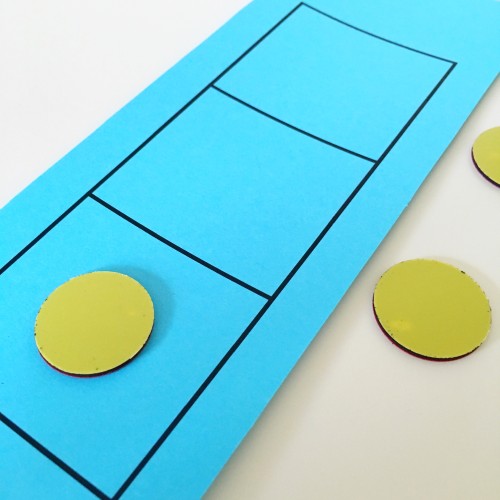
You can download these Elkonin boxes in my free guided reading toolkit (click on the image below to sign up for it):
Once students are doing well with this skill orally, you can tie in some phonics. Say a word aloud. Then have students segment it, touching each box as they say each sound. They may need to practice twice. Then, have students write in a letter for each sound.
Breaking Words with Magnetic Letters
Magnetic letters are great because they can be physically manipulated to draw students’ attention to a particular feature of the word. I love using my tabletop white board (get the one I use HERE) for displaying magnetic letters and modeling how I work with them.
Modeling how to break words (and having students break words with their own letters) can be used to teach:
- Initial or final letter of a word
- Word families
- Digraphs
- Blends
- Chunks
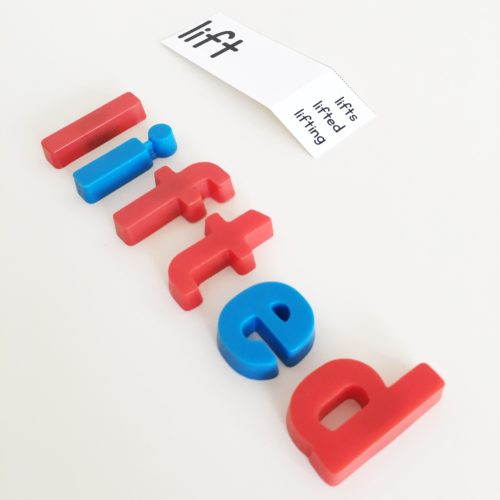
- Inflected endings (-ing, -s, -ed, etc.)
- Multisyllabic words
Just make a word (use one from the day’s guided reading text, if possible), have students read it, model how to break up the word into its parts, draw students’ attention to the feature you’re teaching, put the word back together, and have students read it again.
Here’s an example of a short activity you could do with the inflected ending -ed:
T: “When we were reading The Three Little Pigs, I noticed a lot of words that ended in -ed, like puffed.” (Makes word with magnetic letters) “Let’s imagine that I got to this word and wasn’t sure what it said. In my mind, I could break it up into two parts, puff, and -ed.” (Model breaking up the word) “This last part is made up of -ed. That’s a word ending we see in a lot of words. In the word puffed, what sound does the -ed ending make?”
S: /t/
T: “Right. So we have puff and /t/. When I put them together, it says puffed.” (Puts word back together.) “Now let’s try this with the word huffed. Can you make the word and then break it up like we did with puffed?” (Hands students baggies of magnetic letters to make the word.)
Students should make the word, read it, break it up, and put it back together.
T: “Great job! When you are reading other books, look for that -ed ending. Break up the word in your mind, read each part, and then put the parts back together to make the whole word.”
In a future lesson, we could examine the -ed ending again in a word like “planned,” where the -ed makes the /d/ sound.
Manipulating Words with Magnetic Letters
Magnetic letters are also a great tool for teaching students to manipulate words and create new words.
Let’s imagine that you want to teach the word family -ike. You can put the letters ike up so students can read them. Then, you and the students can practice making many different words, like bike, like, strike, etc.
Activities like this help students begin to look for patterns in words (a very important skill!), because they learn that different words can contain the same spelling patterns.
Comparison T-Charts
Comparison t-charts teach students to think about the sounds in words, and then categorize them based upon words they already know.
For example, if students are ready to work on long vowels, give them each a t-chart and have them write fan and late at the top. Then, dictate one word at a time, having students decide if it has a short a or long a. Students write each word in the column where it belongs.
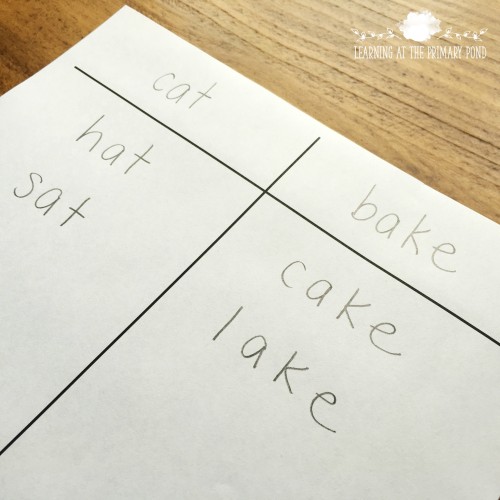
Jan Richardson calls these “analogy charts” in The Next Step in Guided Reading, and she says they’re great for teaching long vowels.
I can also see t-charts being used to compare words with blends, digraphs, word families, and inflected endings. A t-chart and several activity suggestions are included in your free guided reading toolkit download which you can get by clicking on the image below!
Sentence Write and Cut-Apart
Dictating a sentence for students to write is a great way to practice sight words, spelling patterns, and writing conventions (spacing, capital letters, periods). At the end of a guided reading lesson, have students write a sentence (preferably one that’s related to the text and includes at least one sight word they’re working on).
To assist beginning writers, you can use a highlighter or marker to draw a line for each word.
After students have written the sentence (preferably on a whiteboard, unless you want to keep track of their progress over time), go back and help them fix it up.
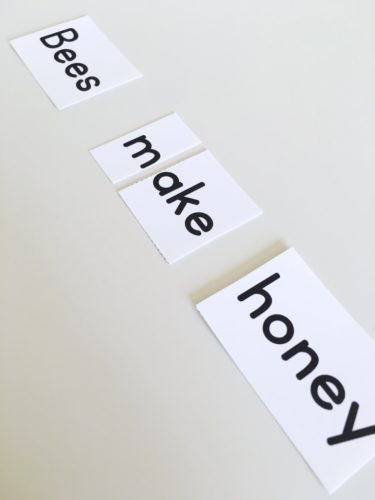
Next, write the sentence on a sentence strip. Cut the sentence apart into the individual words and have students read the sentence again. It’s easiest if you can display the words in a pocket chart, but you can also just put them on the table.
Last, mix up the words and have the students put the sentence back together correctly. Have them decide when the sentence is correct (keep a model for them to use as a comparison).
To make the activity more challenging, you can also cut apart some of the words (i.e. into syllables, or onset-rime) and have students put both the words and the sentence back in order.
Vocabulary Web
Some students won’t need to work on phonics or word patterns during guided reading. Instead, you can use this time to work on vocabulary.
Choose a tier 2 or 3 vocabulary word from the text that students just read. Have students find it in the text, and discuss its meaning.
Display a vocabulary web so that students can see it clearly. Write the target word in the center. Then, have students help you fill out the other circles. Students should use words and phrases from the text (and their background knowledge) that help to explain what the word means, how the word would be used, and other words that it’s connected to.
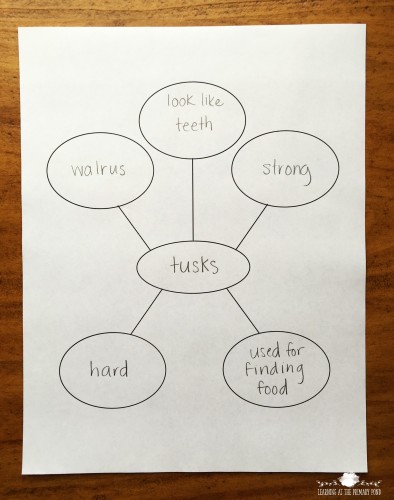
At the end of the activity, have students practice coming up with a sentence or sentences that explains what the word means, using at least 1-2 of the words or phrases in the outside circles. Students can practice first with a partner, and then share with the group. Another alternative would be to compose a short paragraph as a group.
Vocabulary Four-Square
Doing a vocabulary four-square is another way to help students learn a new word from the day’s guided reading text. I like to have students do this as a group, rather than have them complete it individually.
I’ve seen LOTS of different ways to do a vocabulary four square. Since today’s post is geared toward primary readers, here’s the way I’d do it with young students:
- Discuss the word, and have students explain how it was used in the text.
- Write the word in the middle of the page.
- Have students help you draw a picture that represents the word.
- Have students help you write a few examples of how the word would be used.
- Have students brainstorm words that are the opposite of this word.
- Have students define the word in their own words.
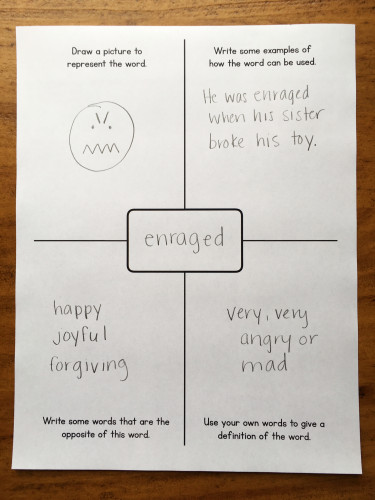
To download a word web and the vocabulary four-square activity, make sure you’ve signed up for my free guided reading toolkit by clicking the image below!
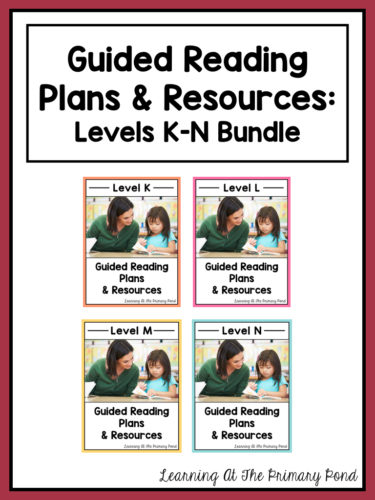
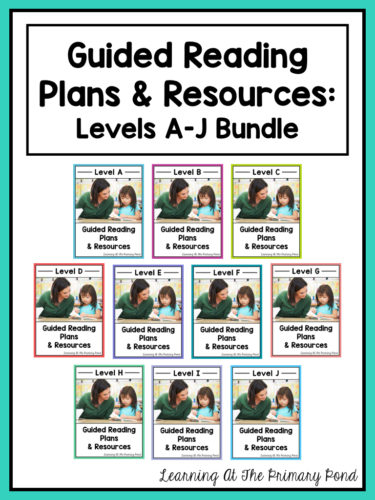
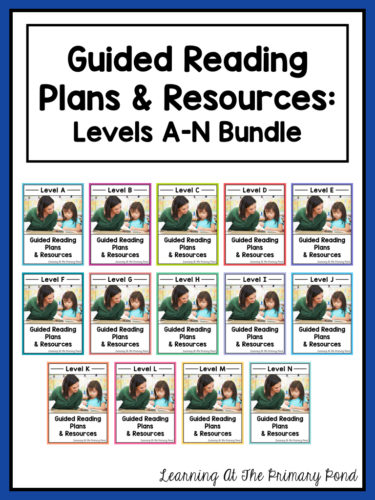
And if you are looking for ready-to-go guided reading resources (with lots of word study and writing activities), click on any of the images below – or click HERE for individual levels/other bundle options!
I hope that at least a few of these ideas will be helpful additions to your guided reading lessons! Next week will be the last post in the series, and I’ll be writing about my own greatest challenge – overcoming the guided reading time crunch. See you then!
Update – the guided reading series is now complete! Check out the posts here:
How to Craft Strong Book Introductions for Guided Reading
How to Effectively Coach Students During Guided Reading
What To Discuss After Students Finish A Book During Guided Reading
10 Post-Reading Activities for K-2 Guided Reading Lessons
Overcoming The Guided Reading Time Crunch
Resources
Fountas, I. C., & Pinnell, G. S. (1996). Guided reading: Good first teaching for all children. Heinemann, 361 Hanover Street, Portsmouth, NH.
Richardson, J. (2009). The next step in guided reading: Focused assessments and targeted lessons for helping every student become a better reader. Scholastic Incorporated.
*The authors of this text are in no way affiliated with this blog – I am referencing their work as a means of explaining and supporting the ideas I set forth in this post.*




I have 24 kindergarteners (I had 26 at one point) and no aide or para. I have a hard time meeting with all my reading groups everyday, and when I do, it’s for about ten minutes. How many groups do you have? Do you meet with each group everyday? How long do you meet with each group and how long is your guided reading time?
Hi Logan, that’s a lot of Kinders! I actually do not meet with all of my reading groups each day – I just see three groups per day in Kinder (with a total of 5 groups in the classroom). This allows me to spend more time with each group (10-15 minutes) rather than rushing to see as many groups as possible. This post has some more info about how long I meet with groups and scheduling: https://learningattheprimarypond.com/blog/overcoming-the-guided-reading-time-crunch/. I hope that helps a little!
Alison
Hi, I just took over a 3rd grade class and just recently did the slosson word site test. I have about 6 kids at the 2nd grade level. I believe these activities will help them.
I love your red and blue magnetic letters. They fit in exactly with the way we colour code our words. Did you buy letters that were red and letters that were blue? Where did you get them from?
Hey Michelle! I got them over 10 years ago and can’t remember. But I know they have them on Amazon, and I think Really Good Stuff and Lakeshore may have them too! 🙂
Alison