
I don’t know about you, but I’ve had some serious woes when it comes to teaching my students to edit their writing. Many, many times I’ve had a student tell me that their draft is done and that they’ve looked it over for mistakes. Then, when I look over it, I find countless capitalization, spelling, and punctuation errors! I’ve found this to be true even for students who have been taught those skills for several years in a row.
It’s hard for young writers to see mistakes in their writing, even when those mistakes may be obvious to us. Teaching students to edit not only involves teaching them capitalization, punctuation, and spelling rules, but also giving them strategies to help them “see” errors.
As I promised in my previous post on teaching revising, in this post I’ll be discussing strategies for teaching editing. I hope you’ll walk away with at least one new idea to try out in your classroom!
1. Teach editing in context, rather than through isolated grammar exercises.
Were you forced to diagram sentences in school? I was. Truthfully, I never figured out how to do it very well, but somehow I’ve managed to become a passable writer (I think, anyway…you tell me :)).
Clearly, there’s a disconnect between isolated grammar exercises and using proper grammar, capitalization, punctuation, and spelling in the context of real writing. And I’ve seen this disconnect firsthand with my students.
A couple of years ago, when I was teaching second grade, I had two students who LOVED fixing incorrect sentences. We hardly ever did sentence fixing, but when we did, they were jumping out of their seats to show me mistakes!
Ironically, those two students were the same ones who were consistently forgetting to capitalize “I,” the first word in a sentence, and include periods in their writing. And since they were in second grade, they’d been taught those skills for almost 3 years at that point.
The bottom line is (and this is backed by research), editing needs to be taught in the context of real writing, not through disconnected grammar drills. Grammar drills are not only boring for many students, but they do not result in students using writing conventions correctly in their own writing.
So what do you do instead? Teach editing skills in context. And show students examples of correct use of conventions, rather than incorrect sentences. After all, we want them to imitate correct writing!
Let’s imagine that you want to teach your first grade students how to use commas in a list.
This skill fits perfectly into a how-to writing unit, so you plan to teach it during that unit.
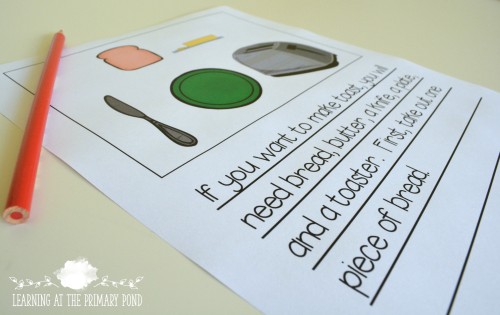
To get started, you select a published, how-to mentor text that has a list of supplies the reader will need. (Example: To build a kite, you will need tissue paper, string, glue, scissors, and 4 straws.)
Read the mentor texts to your students in its entirety, and discuss the ideas with your students. You want the focus of the first read to be comprehension.
Then, later that day or on another day, bring the text back and show students how the author uses commas in a list. Use a document camera to enlarge the text so that students can see it clearly. Discuss the effect that the use of commas has on us, the readers (i.e., we can clearly see each item and understand what is needed for building a kit).
Next, engage in some guided practice with students. This could take the form of them helping you write a list of supplies for a how-to book you are modeling for them. If you use my K-2 Revising and Editing toolkit, you will have kid-friendly how-to texts that you can use for exactly this purpose.
Last, have students try this skill out in their own writing. Have them take a finished or partially completed piece of how-to writing and add a list of supplies (with commas).
Pretty simple, right? Use real texts and have students use the concept in their own, real writing. This strategy makes editing skills “stick” for students.
Of course, not all of your students will have mastered using commas after this lesson! You’ll probably have to repeat this a couple of times with different texts and different genres of writing.
And there’d certainly be nothing wrong with having them do a few comma-inserting exercises to follow up on that skill (my writing units do just that, in fact). Just make sure to prioritize showing students correct usage in real mentor texts, and then having them apply those skills to their own writing.
2. Provide students with clear criteria to use when evaluating their writing.
If we want our students to go back and fix mistakes in their work, we have to clearly tell them what mistakes they need to look for!
The Common Core language standards are a great resources for finding out which editing skills students need to know in each grade level (keep in mind that they are cumulative, so you will likely need to review skills taught in grade levels below yours).
Once you are clear on what you want your students to be able to do, you can create rubrics and checklists to support them with editing. My K-2 Revising and Editing Toolkit has rubrics and checklists that are just for editing, as well as rubrics and checklists that integrate both revising and editing.

As I mentioned in last week’s post, it’s super important to spend time teaching each part of a rubric to students. Do lots of modeling and thinking aloud, so that they really learn how to use the rubric as a tool. You can cut apart the strips of the rubric to really break it down and make it “digestible” for young students.
In addition to using rubrics and checklists, another great way to provide students with clear criteria is through an editing flip book.
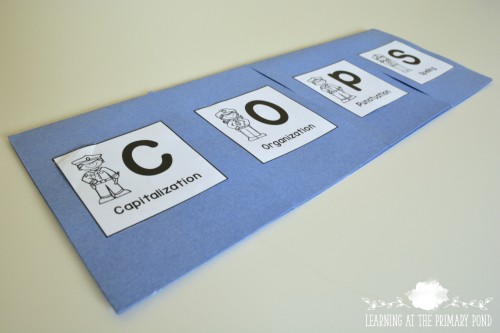
The purpose of this flip book is to give students a reference tool that encourages them to edit one piece of work multiple times.
Here’s how it works:
- Have students make the book (the printable supplies and directions are in my K-2 Revising and Editing Toolkit)
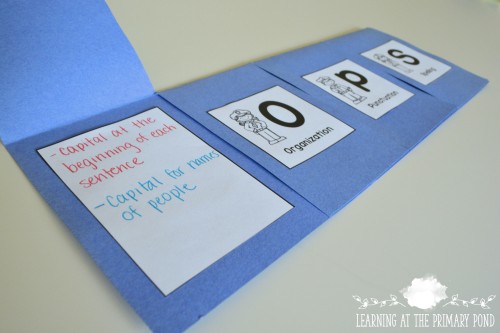
- Under each flap, guide them through writing the rules that they’ve learned in each area (C = capitalization, O = organization – handwriting and paragraphing, not content, P = punctuation, and S = spelling)
- Have students keep the completed flip books in their writing folders. If you teach a new skill, have them add it under the corresponding flap.
- When students are ready to edit a piece of writing, have them go through the flip book, one flap at a time. They should review what’s under one flap, and then read through their work one time, looking ONLY for that type of mistake.
- When students are finished, they should have read through their piece of writing FOUR times, looking for a different type of error each time (this helps them focus and find more mistakes overall).
Rubrics, checklists, and flip books all serve to provide clear criteria to our students, so they always know what they are expected to look for when editing their work.
3. Model, model, and model some more.
Students need to see you edit your writing and hear you think aloud as you edit. You can do this when you’re doing any type of shared writing throughout the day – it doesn’t have to take place during writing time!
My K-2 Revising and Editing Toolkit has kid-friendly mentor texts that you can use for this purpose. You can use the “correct” version of a text to go through and highlight correct punctuation and capitalization in the text.
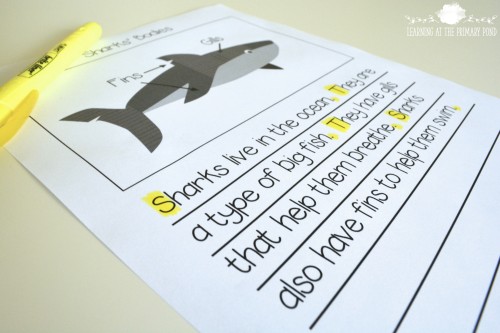
You can also use the incorrect versions of the text (also provided) to model how you fix mistakes in the work (although again, I recommend placing emphasis on correct usage).
4. Have students get help from their peers.
I would bet that when you are writing something important, you like to have a friend look it over for mistakes. Right? Well, the same thing applies to our kiddos!
In last week’s post, I talked about setting up a revising and editing table for your classroom. Please head over to that post to read more about how it works.
Basically, the revising and editing table is something you set up in your classroom during writing workshop time. It’s a place where students go to get help with revising and editing their work. The best part is that you don’t have to be providing that help! Once you teach the students how to use it and work together effectively, the table runs by itself.
When it comes to having students work on editing at the table, small sticky notes are a great tool. I never have students write directly on their friend’s paper – that would not be showing respect to the writer. I also never have students make changes while they are sitting at the table, because that just takes up too much time.
Instead, what I have students do is write down notes about missing capital letters, missing periods, misspelled words, etc. on those small sticky notes. They can place the note directly on their paper and then go back and fix up their work at their seats.
Using a revising and editing table in my classroom made a HUGE difference for my students – they were much more likely to find and correct mistakes in their work! I really encourage you to try one out in your own classroom (my K-2 Revising and Editing Toolkit has detailed instructions and lessons that you can use to introduce the table).
5. Use visuals as editing reminders.
My last strategy for teaching editing is one that applies to teaching almost any skill…using visuals! Kids forget things easily, but if we support them with visual tools, they will be more likely to use the skills we teach them.
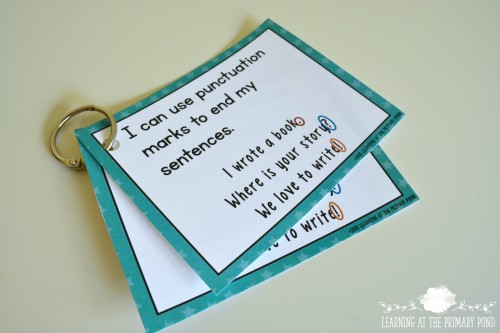
The photo below shows a small binder ring with editing strategy cards. If there are 2-3 strategies you want students to really focus on, you can create these strategy card rings (differentiate as necessary), and give them to students to use during writing time.
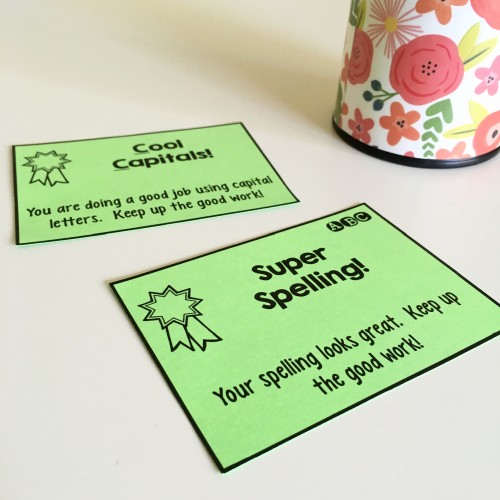
A fun, visual way to recognize students for using good editing skills is to use Conventions Cards. These are simple cards that recognize students for using capital letters correctly, good handwriting, proper spelling, etc.
First, copy the cards onto colored paper. Explain what they are, and get students excited about them.
Then, while students are writing, walk around the room silently. Notice which students are using conventions correctly, and slide one of the cards onto their desks.
Not only does this acknowledge students who are doing good editing work, but it also encourages students around them to “clean up” their own work. Kids love getting these cards!!
To download the cards for free, click on the image below. My Toolkit also has additional options for Conventions Cards.
Conclusions
Phew, this was a long post! Thanks for sticking with me! To summarize, you can teach students to edit by:
- Using published mentor texts as exemplars and having students try out writing conventions in their own writing (instead of using only grammar drills)
- Providing students with clear criteria for editing
- Doing lots of modeling and think-alouds
- Having students engage in peer editing, and
- Providing visuals to support students with their editing
Is there anything that you would add to this list? Please comment below! Or if you’re already using my toolkit, let me know how it’s going!
Happy teaching!
Resources
Graham, S., MacArthur, C. A., & Fitzgerald, J. (Eds.). (2007). Best Practices in Writing Instruction. New York, NY: The Guilford Press.
Morrow, L. M., & Gambrell, L. B. (Eds.). (2011). Best Practices in Literacy Instruction (4th ed.). New York, NY: The Guilford Press.
National Governors Association Center for Best Practices & Council of Chief State School Officers. (2010). Common Core State Standards. Washington, DC: Authors.
Ruday, S. (2013). Five Recommendations for Teaching Common Core Grammar to Elementary Students. Larchmont, NY: Eye on Education.


Do you offer your products in Spanish as well?
Thanks!
Hi Cecilia! I do have some of my products in Spanish (not all). You can see the bilingual products here: https://www.teacherspayteachers.com/Store/Ms-Lilypad/Category/Bilingual-Materials
Let me know if there’s anything else I can help with! 🙂
Alison
Hi Alison,
I’m a bilingual teacher and would love to see your Revision & Editing TPT resource in Spanish as well!
Thanks!
Thanks for the suggestion, Whitney!!
Alison
Great advice. I will add these strategies to my instruction. Thanks for sharing!
Can these materials be used for older elementary age kids? I feel like my 3rd and 5th graders have a shaky writing foundation. Thanks.
Hey Jessica! Yes, I think that many of these strategies (and the materials in the revising and editing toolkit) can be used with older kiddos. You might want to adapt a few materials here or there so that they have a less “babyish” feel, but many of the same strategies will still work for them!
Alison